It's been over 7 weeks since I last posted on the work being done to Untethered. We have finalized the scope to the following:
The following is being done by the RAM crew:
- Painting the deckhouse and hull
- Sandblasting, repairing blisters, barrier coating and bottom painting under the waterline
- Significant repair work to cosmetic issues in the hull and superstructure
- Repairing bulges and thin spots in the stabilizer fins
- Removing and rebeding the rub rails and replacing all screws
- Fabricate, install and paint to match a hardtop extension onto the existing arch
- Fabricate a new plastic venturi (wind screen) for the flybridge
- Regalvanize one anchor (sent to Guatemala City)
- Recertify all fire extinguishers (sent to Guatemala City)
The following mechanical work is being done by Nelson Chacon (local mechanic) sourced through RAM:
- Remove old and install new Torrid hot water heater
- Replace the cutlass bearings on the main shaft
- Replace the PSS seals on the main shaft and the rudder shaft
- Remove, paint and replace the autopilot pump motor
The following stainless steel work is being done by Arturo (local machinist) sourced through RAM:
- Fabricating 2 new bow rollers
- Fabricating a new life raft bracket mounted on the boat deck railing
- Fabricate a tool box shelf on top of the main engine
- Fabricate a new emergency tiller (factory one doesn't fit)
The following wood work is being done by Adil sourced through RAM:
- Remove and replace teak deck caulking and sand the deck
- Sand and revarnish sun damaged teak in the pilot house and salon
- Sand and revarnish some teak on a cabinet, drawers and settee in the cockpit
- Repair damaged finish to the dining table
- Sand and revarnish 2 flag staffs
The following is being done by me while the other work is being done:
- Get a survey done (required by insurance) by Chris Wooley (Rio Dulce surveyor), then address the findings
- Replace the gear oil and shaft seals on the bow and stern thrusters
- Replace a cracked A/C sea strainer bowl
- Repair a poor splice in the wing engine control wires between the engine and the pilot house panel
- Change Starlink mounting point to top of arch, run wire and connect with new Peplink router to run off of DC (not AC)
- Rewire ignition wire on Zeus regulator
- Replace start batteries for dinghy, main engine and generator
- Install a battery voltage sense wire from new Victron Skylla charger in E/R up to house bank in VIP stateroom
We're dong a lot of work, but when complete, the boat should look amazing and perform excellent.
We've been very happy with the work so far. We were quoted between 3-4 months to paint the boat and a fixed price. The price hasn't changed (except for my additions) and it will probably take 5 to 5 1/2 months, again, because of our changes. It was the hardtop that extended our stay here. I will create another blog post just focusing on the hardtop, because it is a story in itself. If your boat didn't need much fiberglass repair work, and you didn't add on projects that can't be done in parallel, you should be done in 3-4 months.
Getting special supplies takes about a month to receive in Rio Dulce. My new Torrid hot water heater left Florida over 5 weeks ago and it isn't here yet. That's not RAM's fault, it's a consequence of shipping and Customs in Guatemala.
Since the last update there has been at least 3 men working on the boat every day, 5 1/2 days a week. Sometimes more than 3. They have been applying fairing compound and primer and sanding between applications. Instead of writing a lot, I'll post some pictures with explanations to describe what's going on.
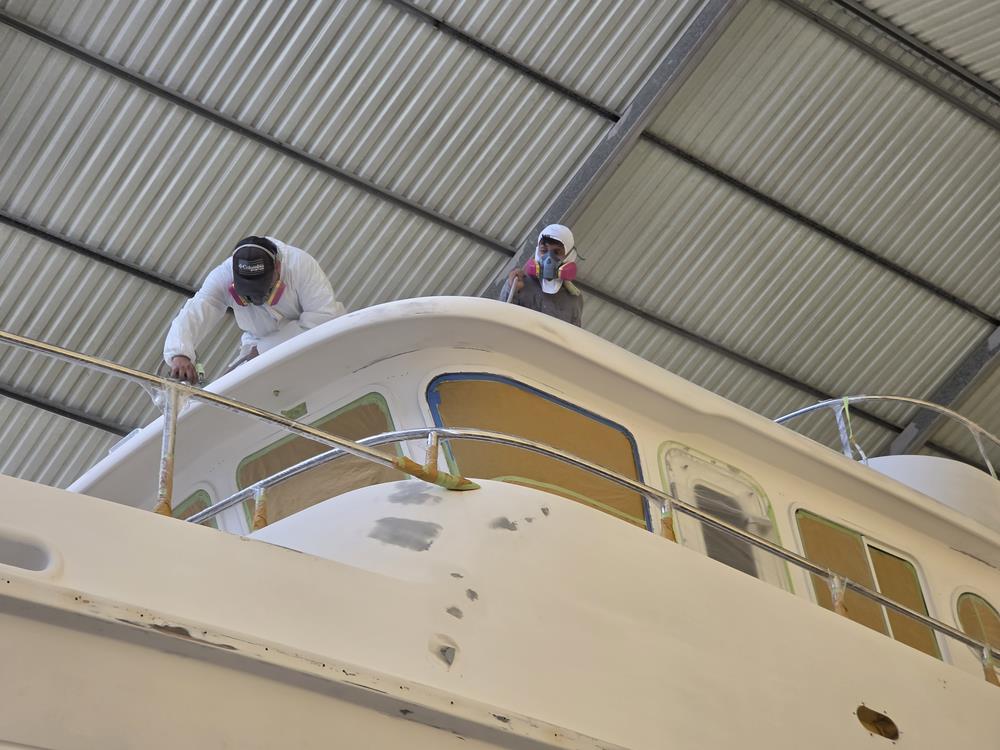
When they apply paint or primer in this case, there are 1 or 2 other guys that manage the compressed air hose.
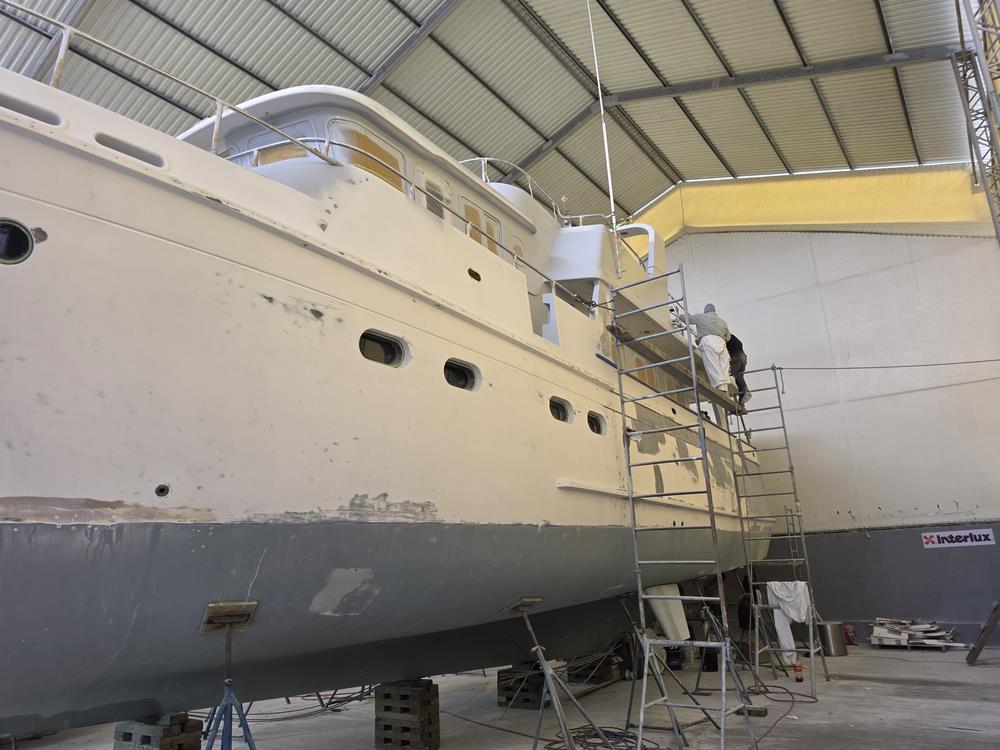
All of the flag blue paint has been removed off the hull and the hull and the superstructure has been faired somewhat. They are applying the first of many primer coats and adding fairing in between coats when they see a low spot. This takes several iterations.
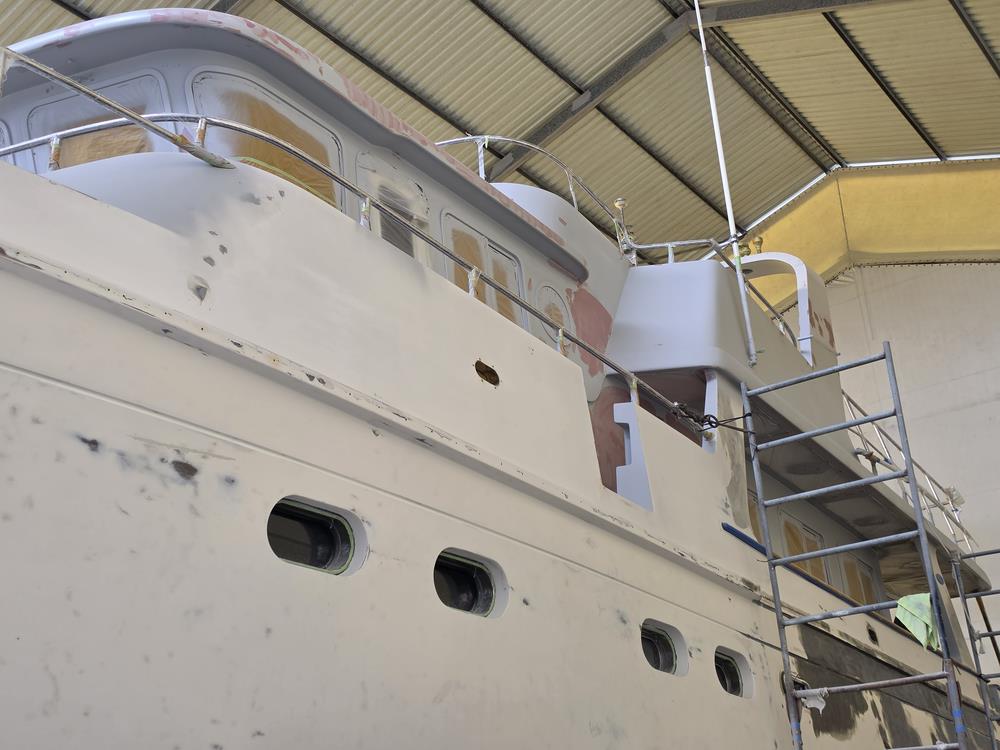
Gray primer with some red fairing compound on the top deck.
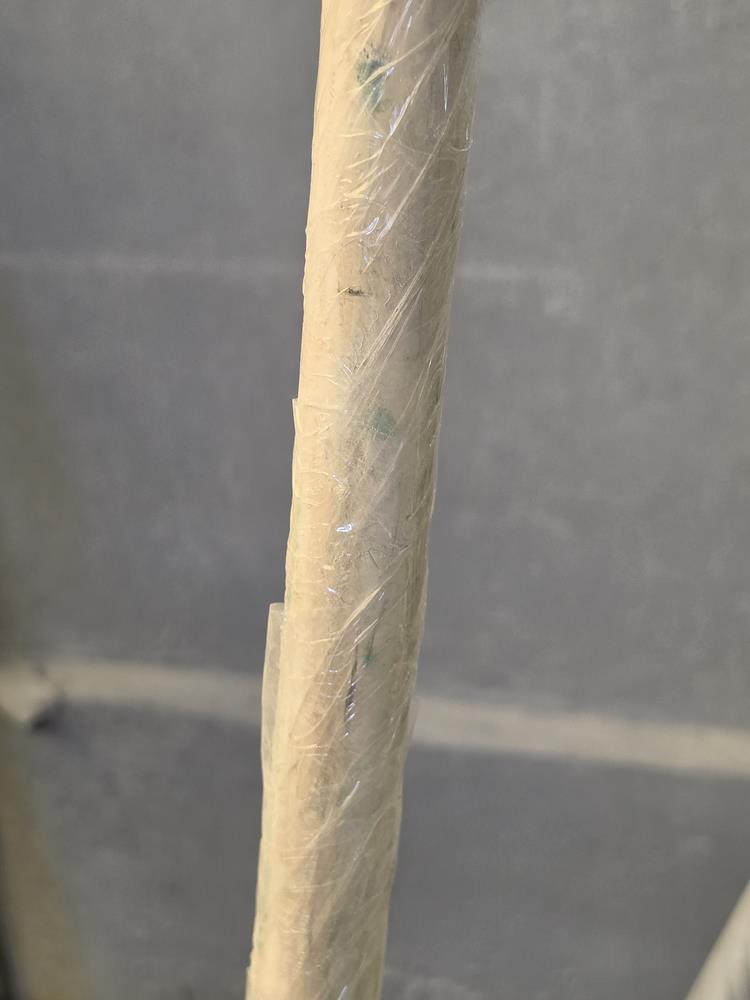
This is our power cord. How many times have you gotten work done on your boat at a boatyard and the power cord got really dirty from it being dragged over the floor and people walking on it. RAM wraps it in plastic to protect it. BTW, we had power to the boat to keep the batteries charged and to run a DEHUMIDIFIER. This is a rain forest. It's hot and humid. Perfect conditions for mold to grow on the boat. The dehumidifier prevents this and it's mandatory IMO. We drained it into the mid bilge and the pump pumped it overboard. It wasn't a problem.
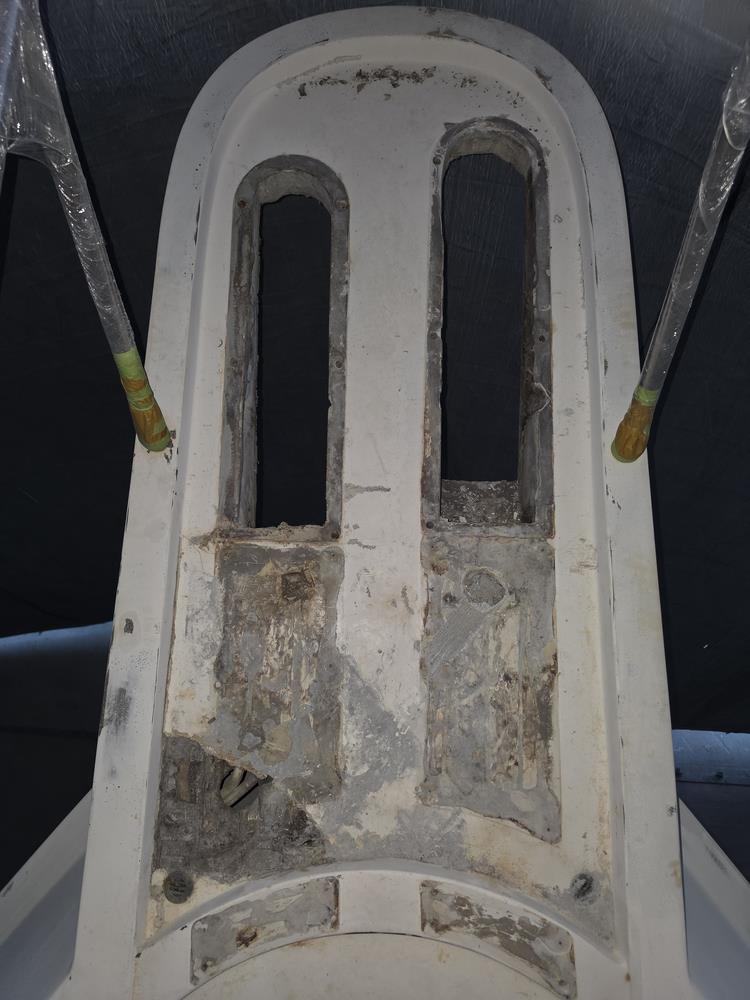
This is beginning repair work on the anchor pulpit. They dug the old, rotten wood out and let it air dry for several weeks. Then they wrapped plywood with epoxy resin and fiberglass and filled the void left by the rotten wood. Then they filled the gaps with epoxy.
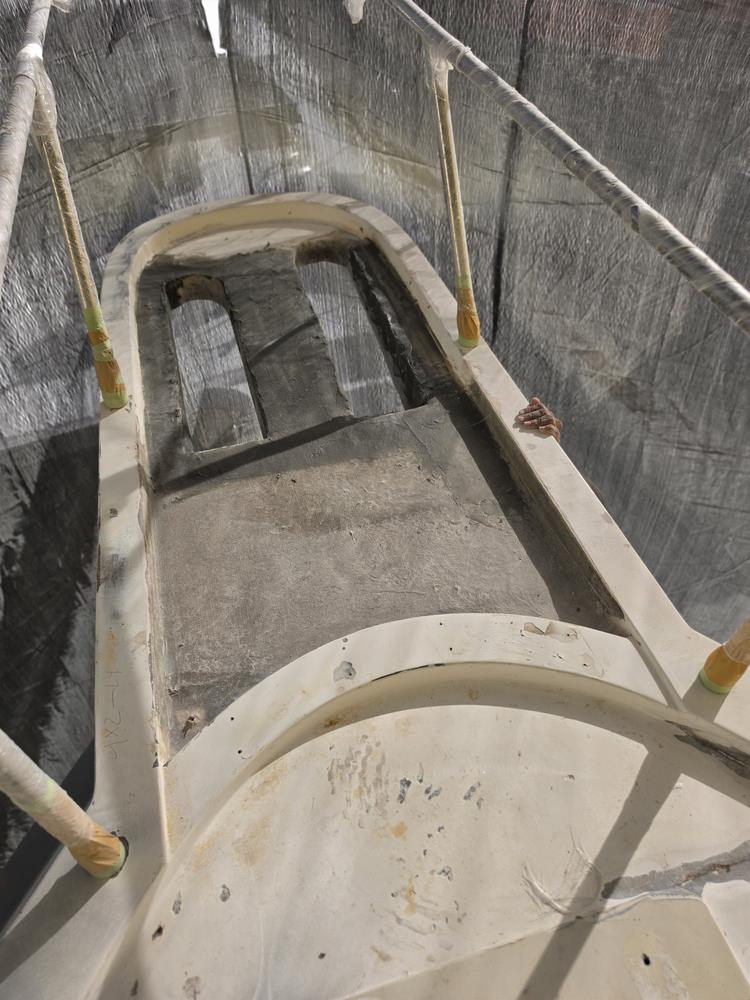
A little further along.
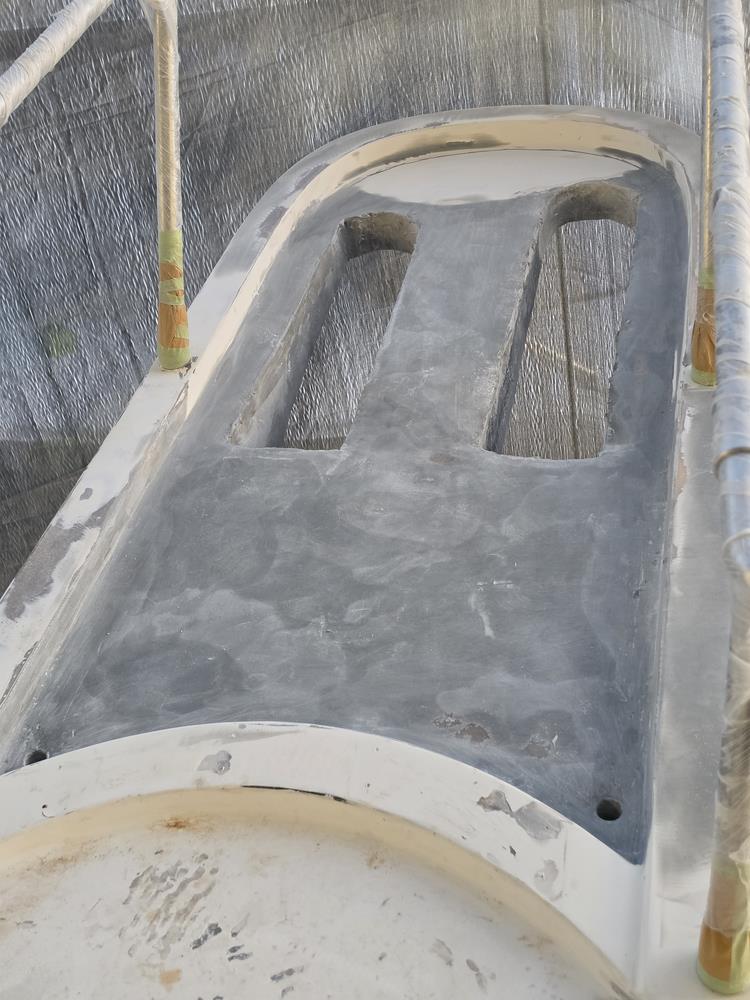
A little farther along. This will be VERY weather resistant.
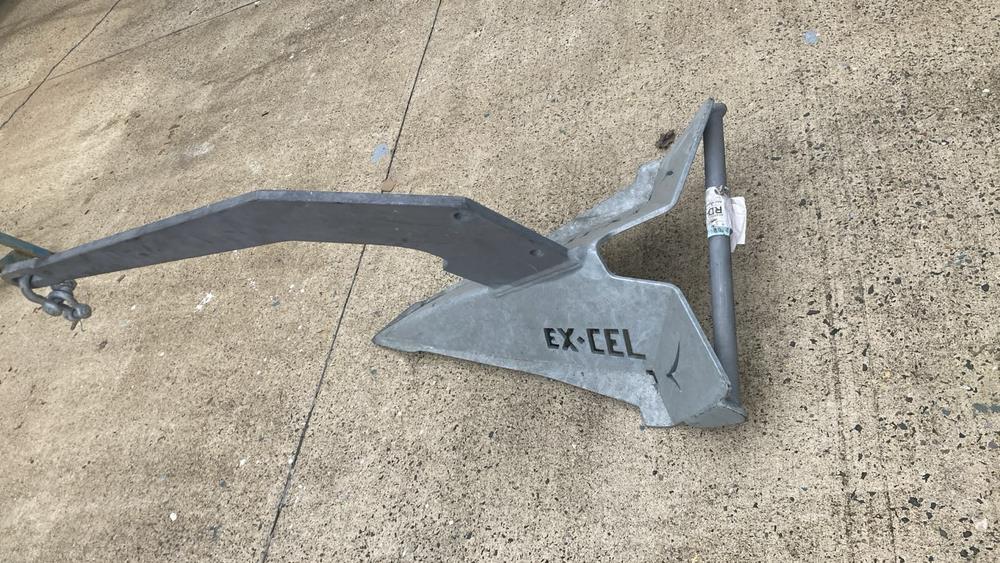
Freshly regalvanized Sarca Excel anchor ready to go back on the boat. If your anchor has lead in the tip it cannot be regalvanized.
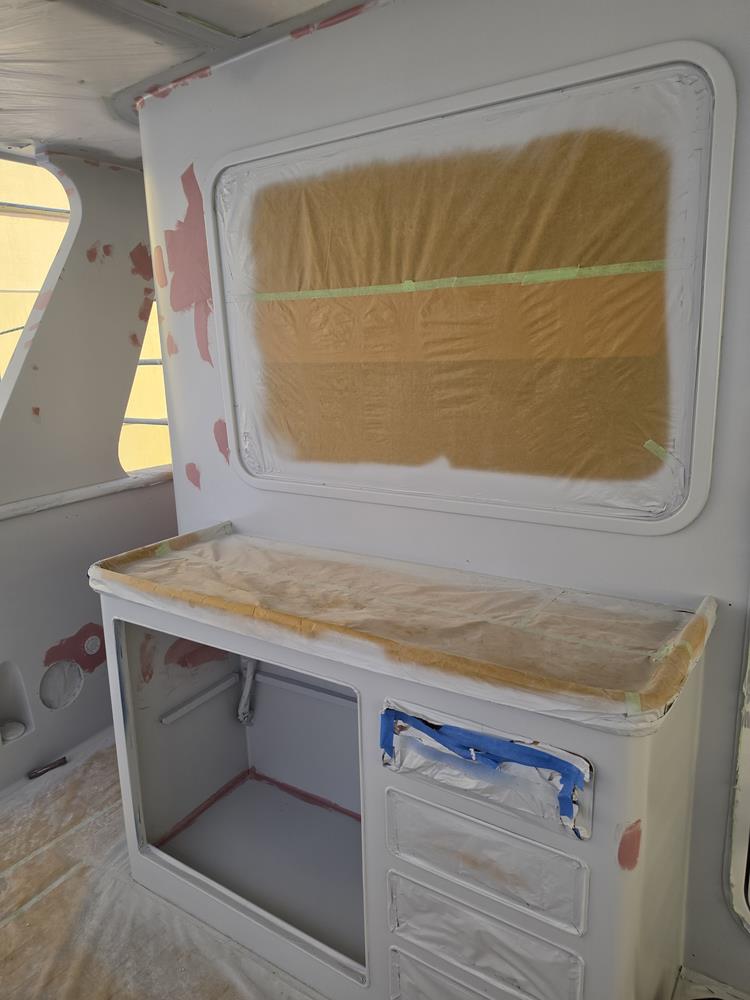
We have this cabinet and drawers in the cockpit. The wood guy will finish the louvered doors and wood trim around the drawers. They even paint the inside of this cabinet.
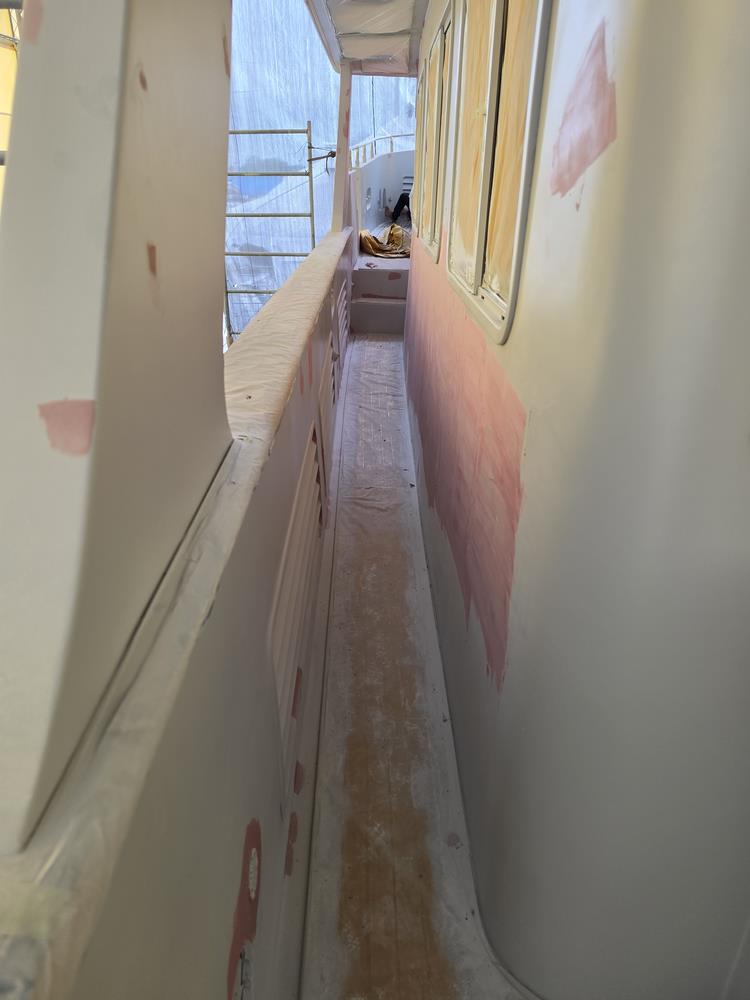
They spent a lot of time sanding and fairing the side deck area. There were a few cosmetic cracks and defects. It should look like a mirror when they are done.
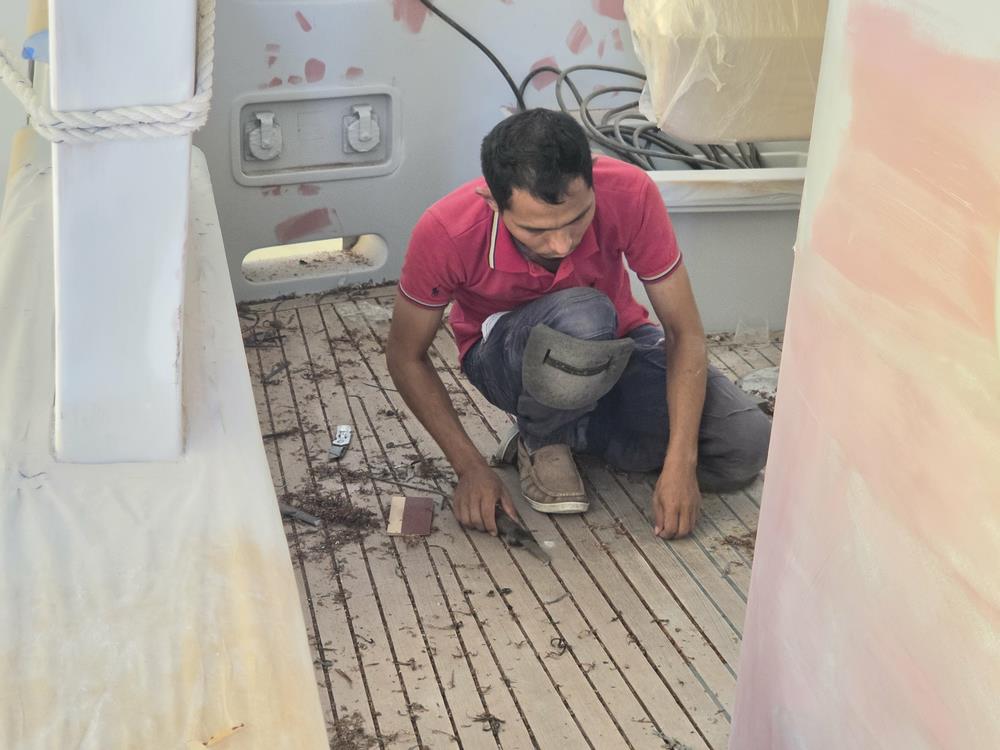
Adil had his crew remove the caulking from our teak deck. Fortunately there is plenty of wood left for new caulking.
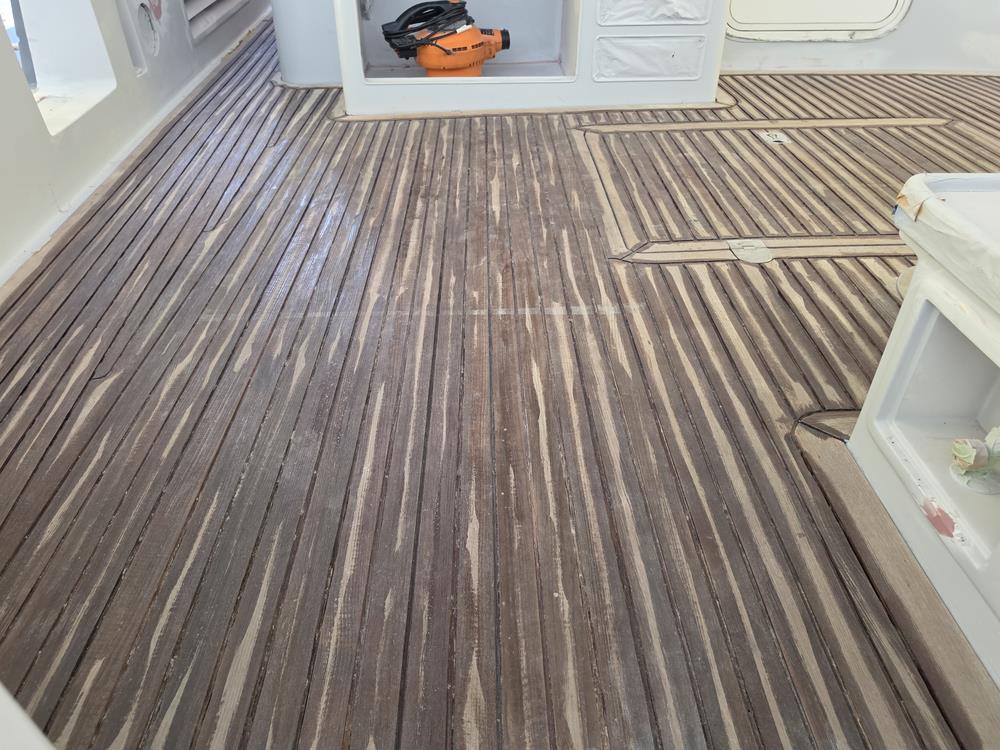
After removing all of the caulk and cleaning the grooves with acetone to remove oils they applied an epoxy in the grooves to provide a good bond between the wood and the caulk.
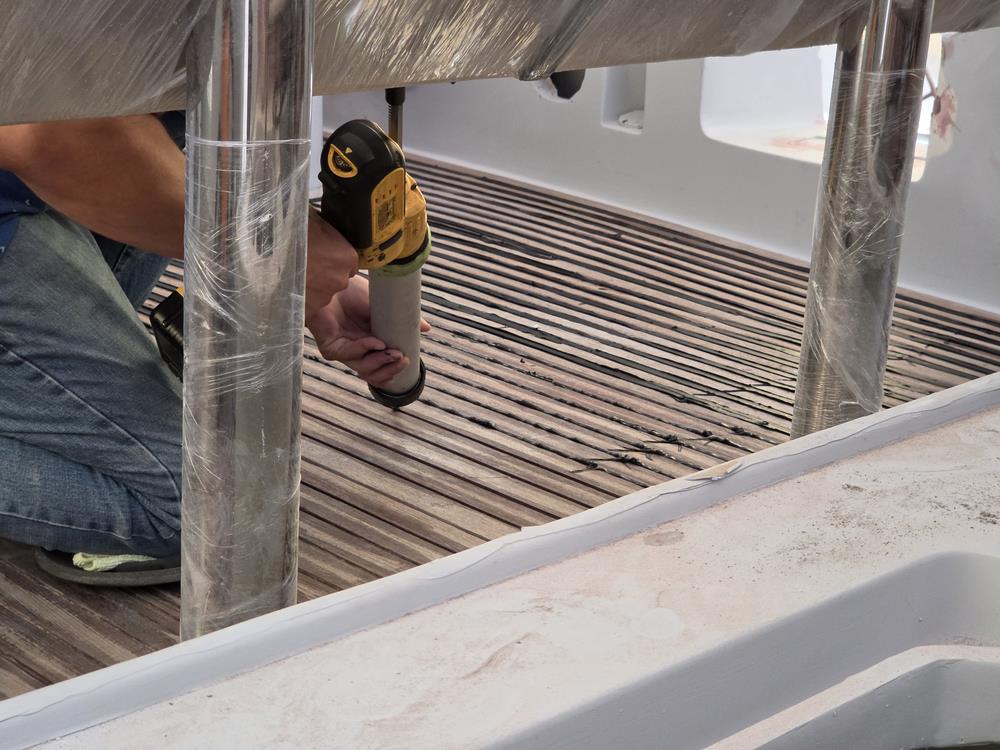
After the epoxy was cured they applied the TeakDeckSystems SIS 440 caulk with this cool caulk gun.
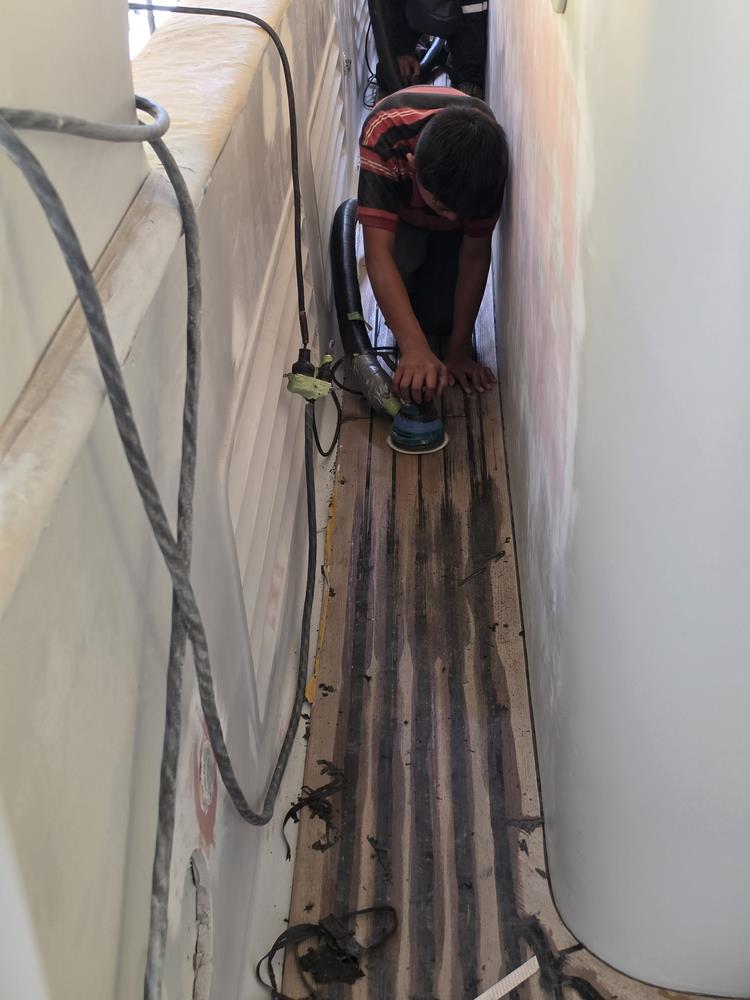
After a 3 day cure time they sanded a couple millimeters off of the top, just enough so the epoxy doesn't show. BTW, Kelly was disturbed because she thought the wood guy was using child labor on his crew. Adil said this guy was in his late 20s. Guatemalan people are generally small.
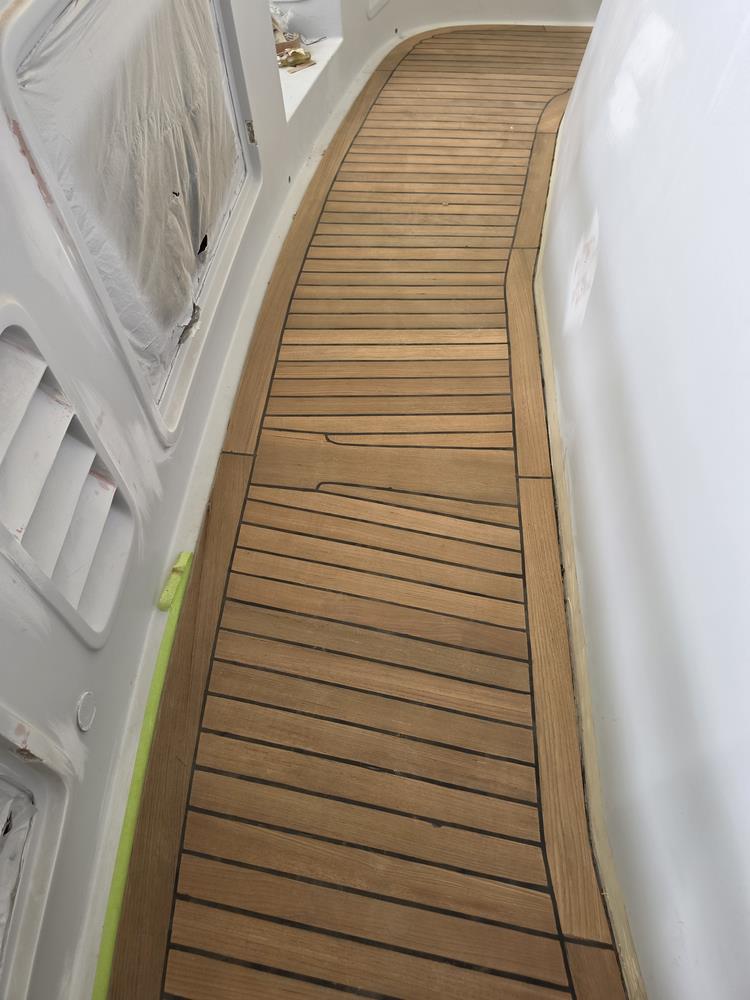
The (almost) finished product. The caulking on the perimeter was intentionally not done. The painters will mask the teak, then paint, and the perimeter caulk will go over the fresh paint.
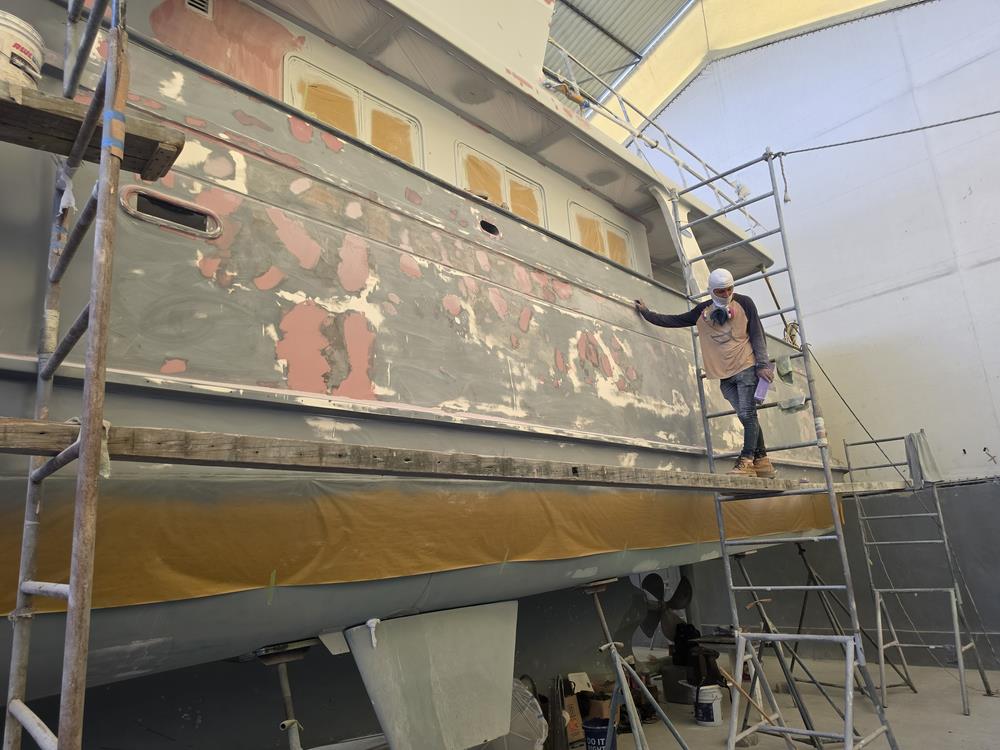
This is the area of the hull that had the worst cosmetic issue. After chipping the top layer of fiberglass, grinding it smooth, laying in new layers of fiberglass, fairing, now it's ready to prime and fair some more. I like the pink and gray camo look!
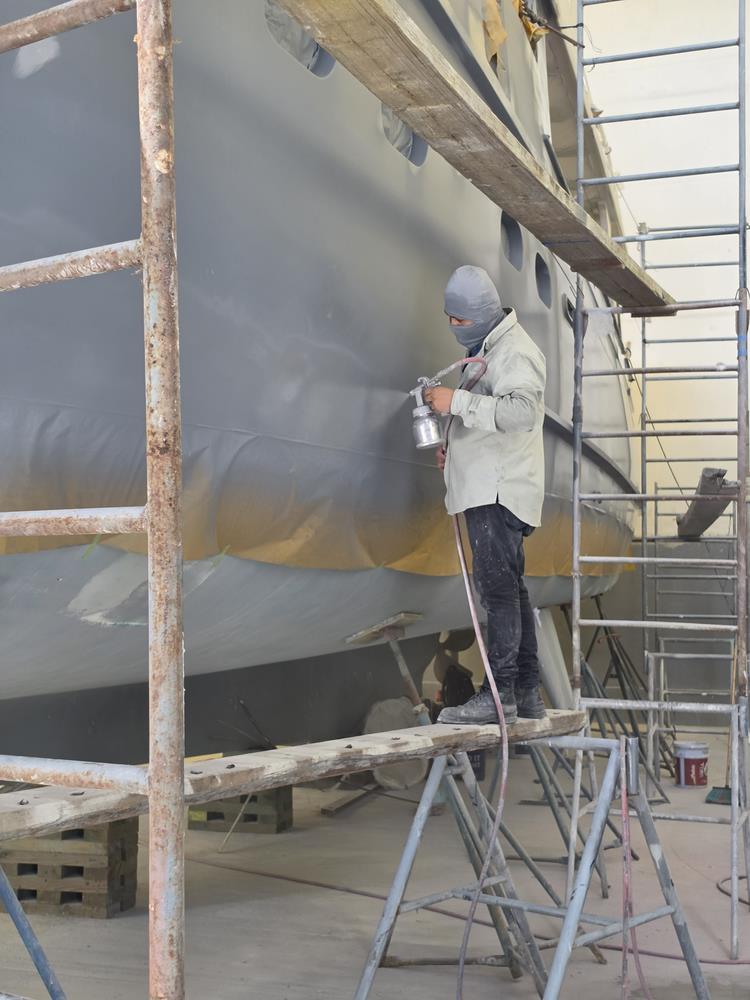
First coat of primer.
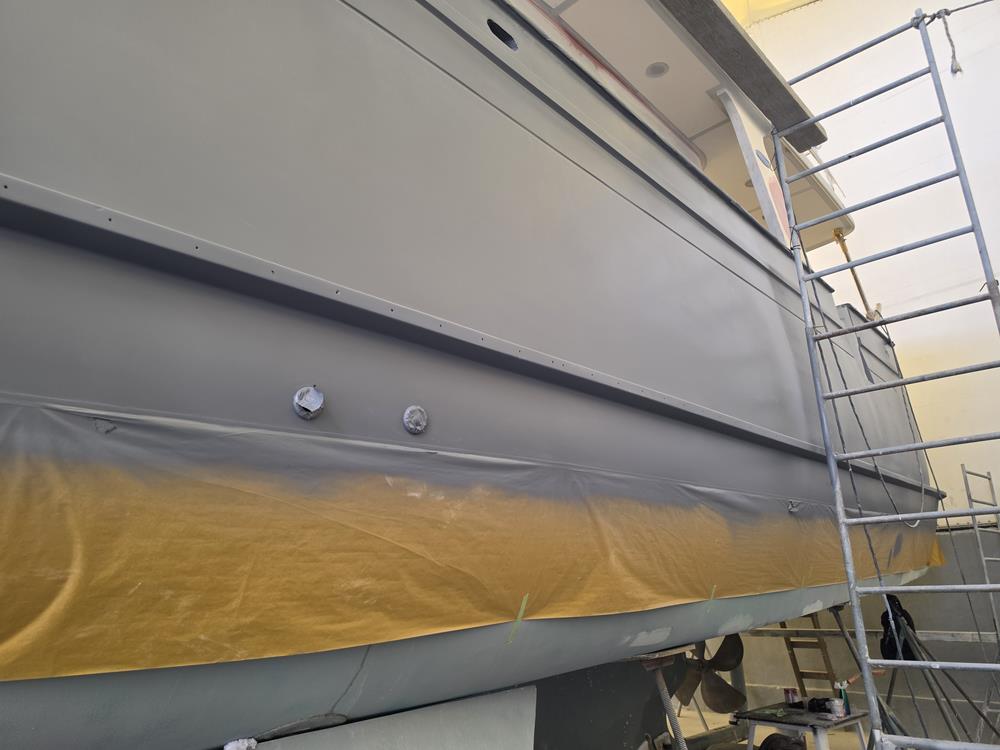
Muy Bueno!!
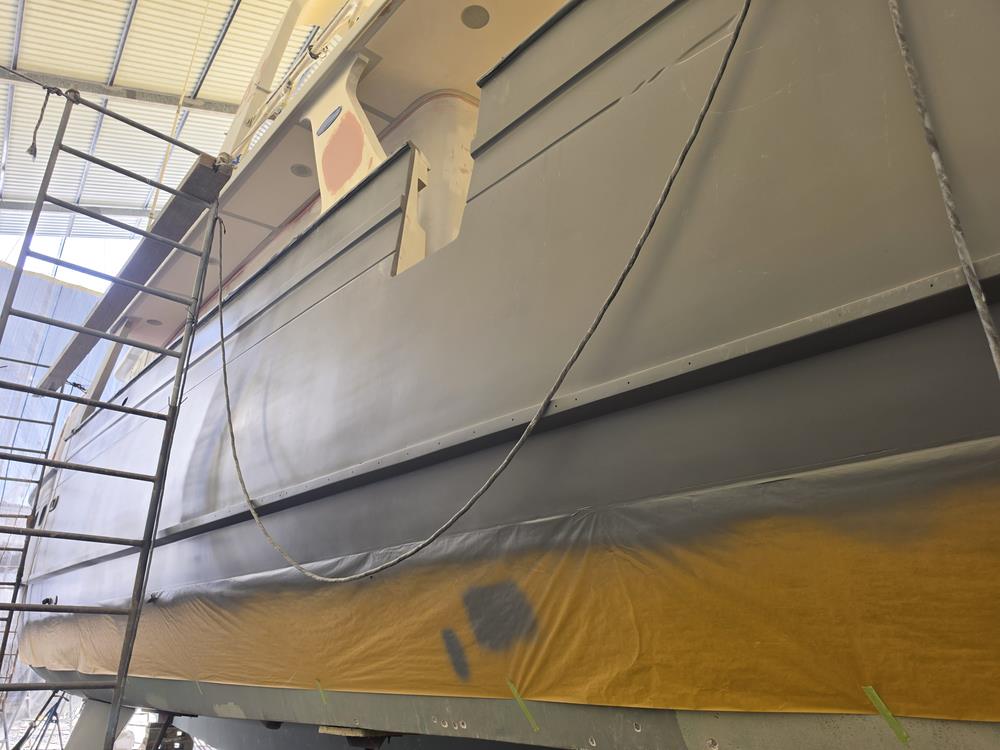
First coat looks nice.
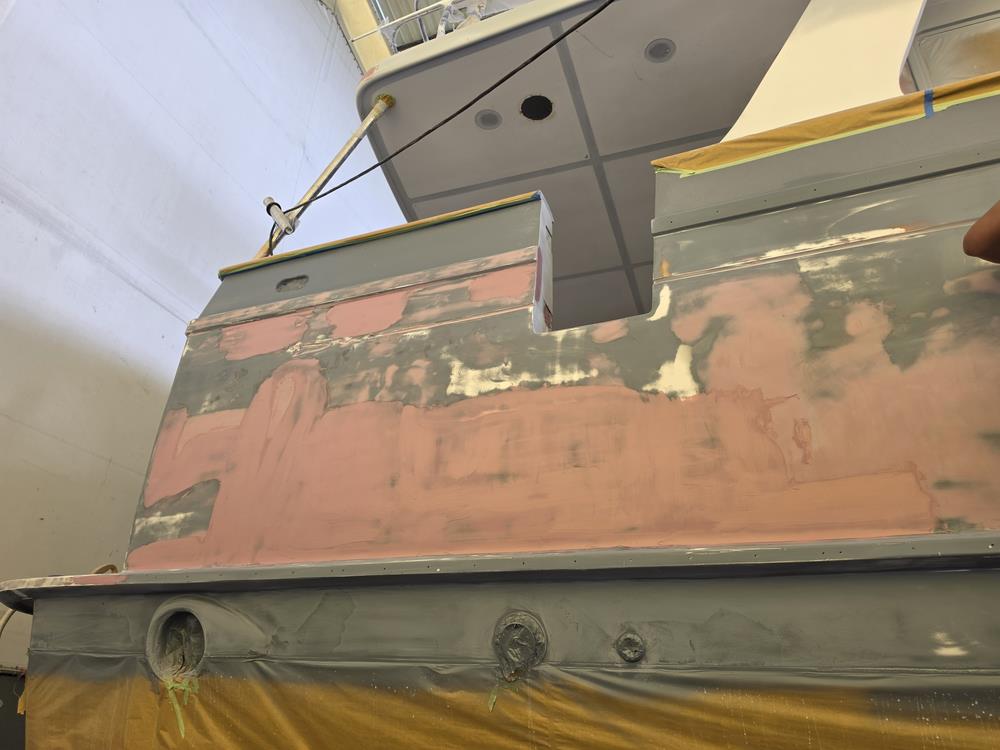
The other side needs the treatment.
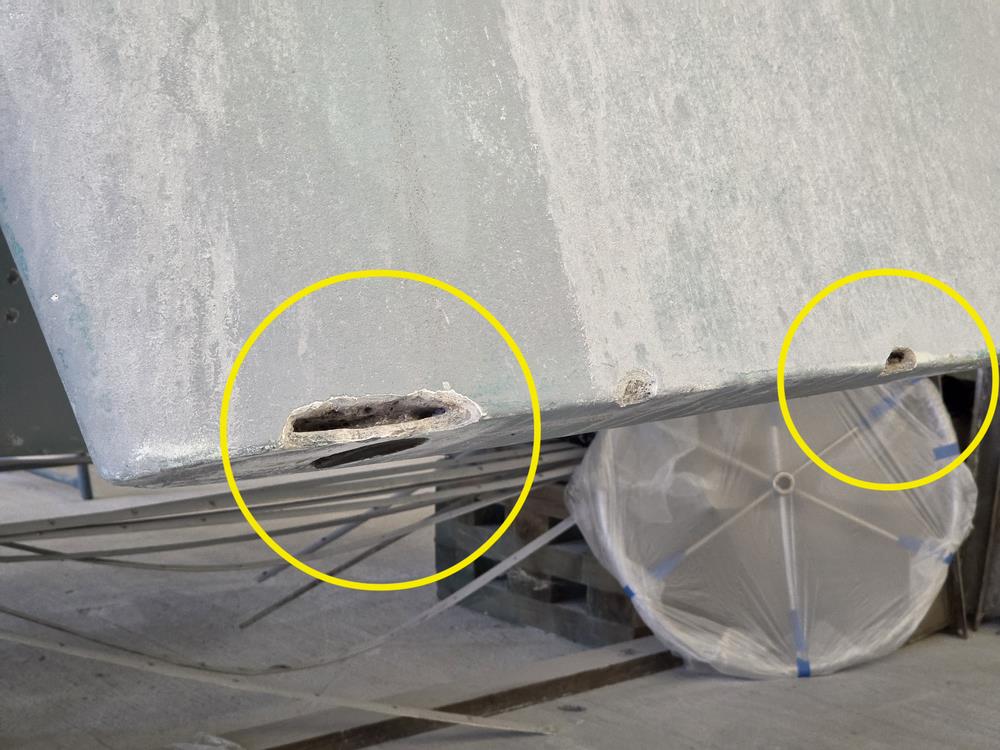
I opted to have the bottom sand blasted. Some of you may think that is too aggressive, it should be soda blasted. But RAM uses a very light approach to sand blasting by stepping back some and hitting the boat at an angle. It is effective at exposing blisters and, in this case, thin spots in the stabilizer fins. After finding problem areas they used a grinder to open up the area and uncover the problem.
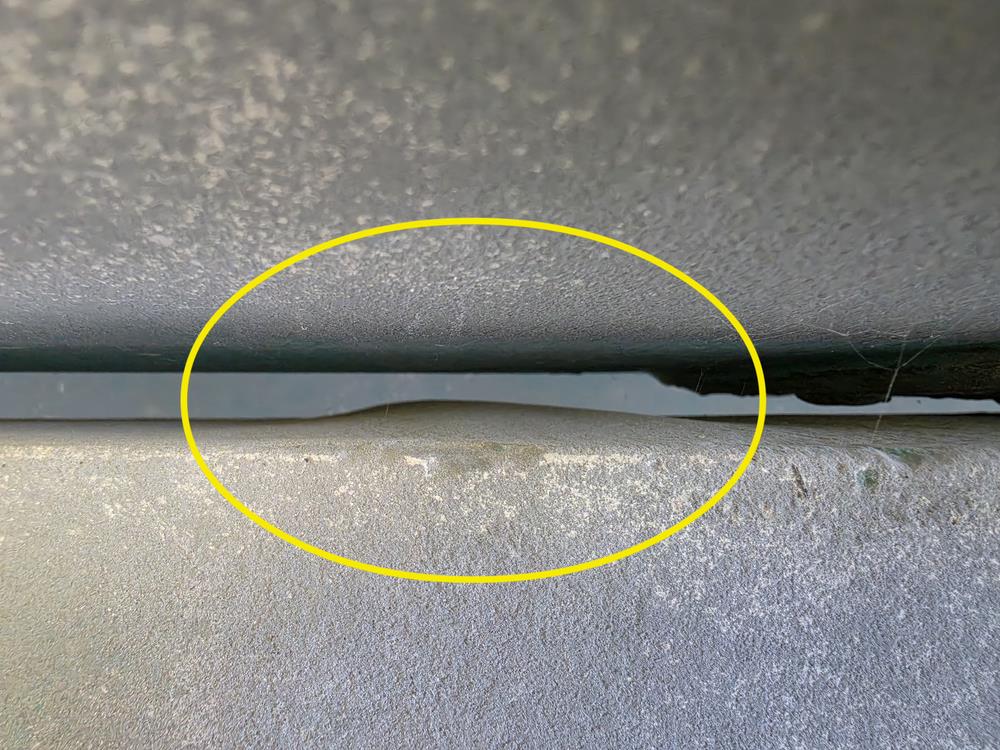
This is the top of the starboard stabilizer fin. Since owning the boat this bulge existed and a larger one (but more difficult to photograph) on the inside of the fin. The surveyor assured me it wasn't a problem, but who really knows? So I had a local expert remove the fin and RAM removed the skin on the stabilizer to determine the root cause.
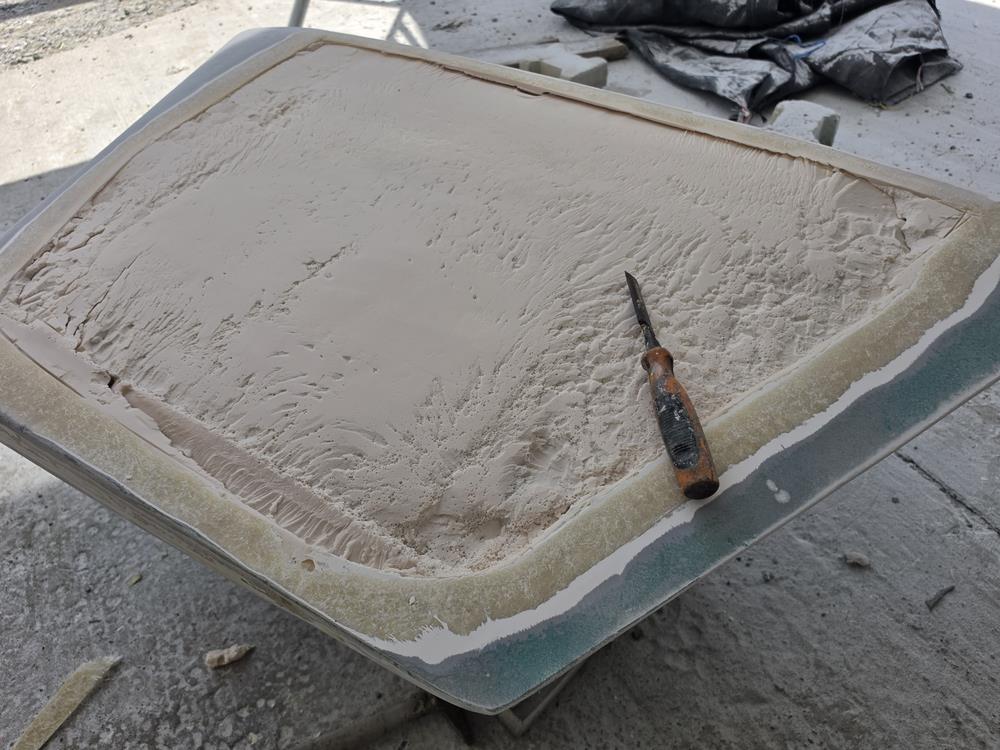
After removing the fiberglass skin where the large, suspect bulge was it was apparent that their wasn't enough filler (foam?) and the fiberglass skin wasn't bonded well to the filler.
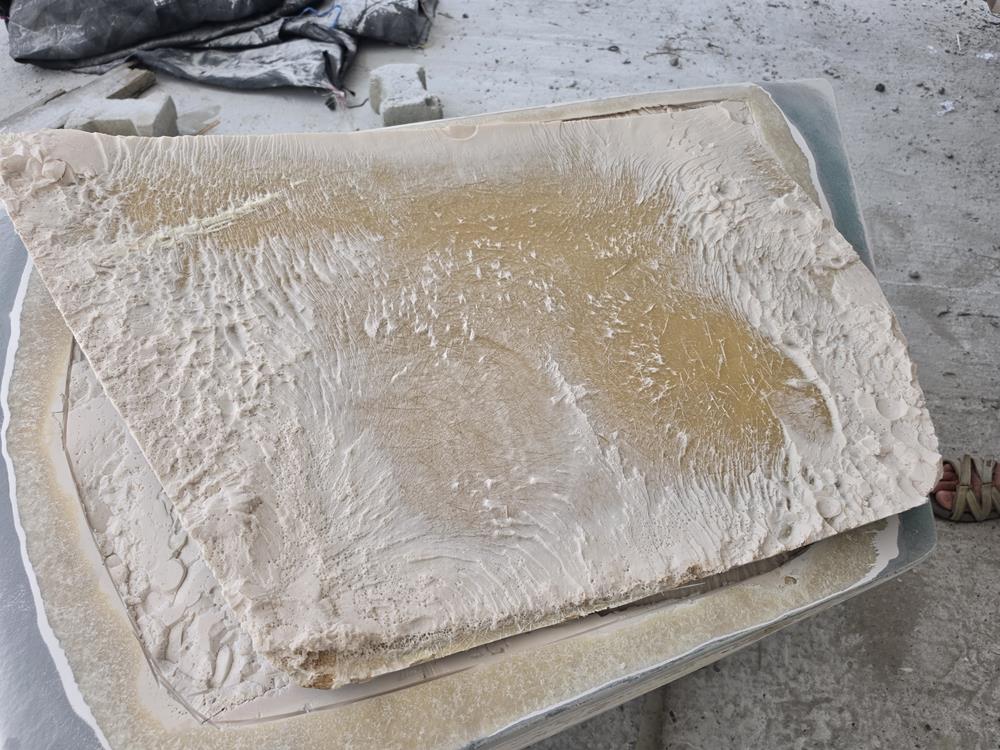
The skin had bulged out where the filler had not bonded to the skin. Structurally the fin was fine, but the cosmetic issues placed doubt about that.
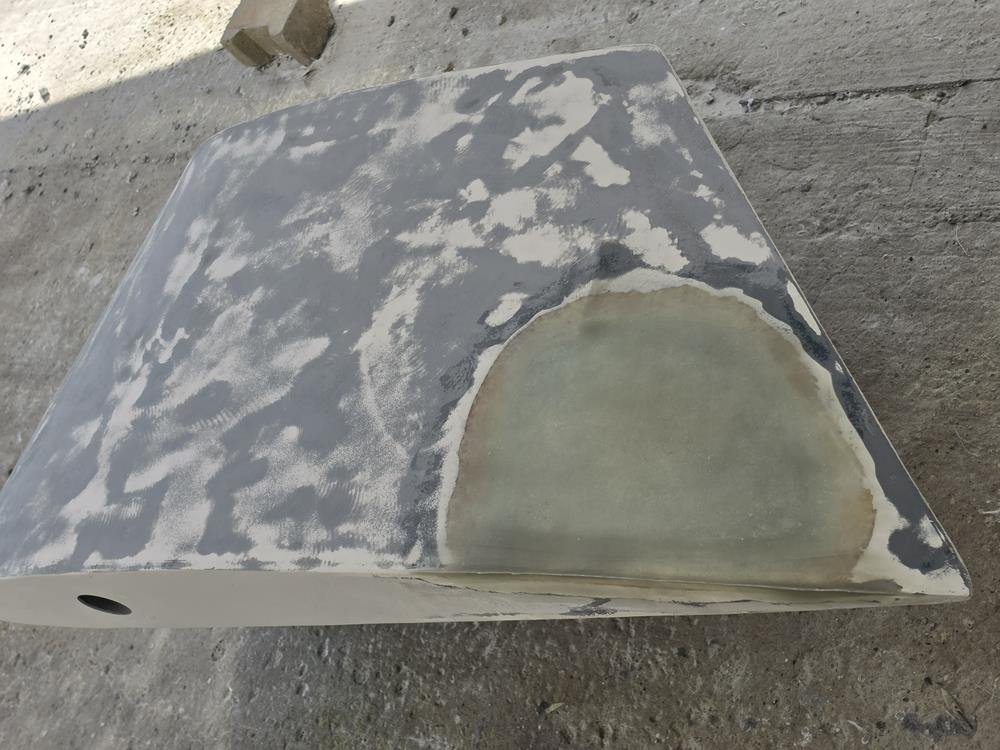
This is another area that they repaired. I can't remember seeing a defect in this area, but apparently the crew did and thought it needed repair. They filled the voids with a thickened epoxy and sanded it to shape before refiberglassing the area.
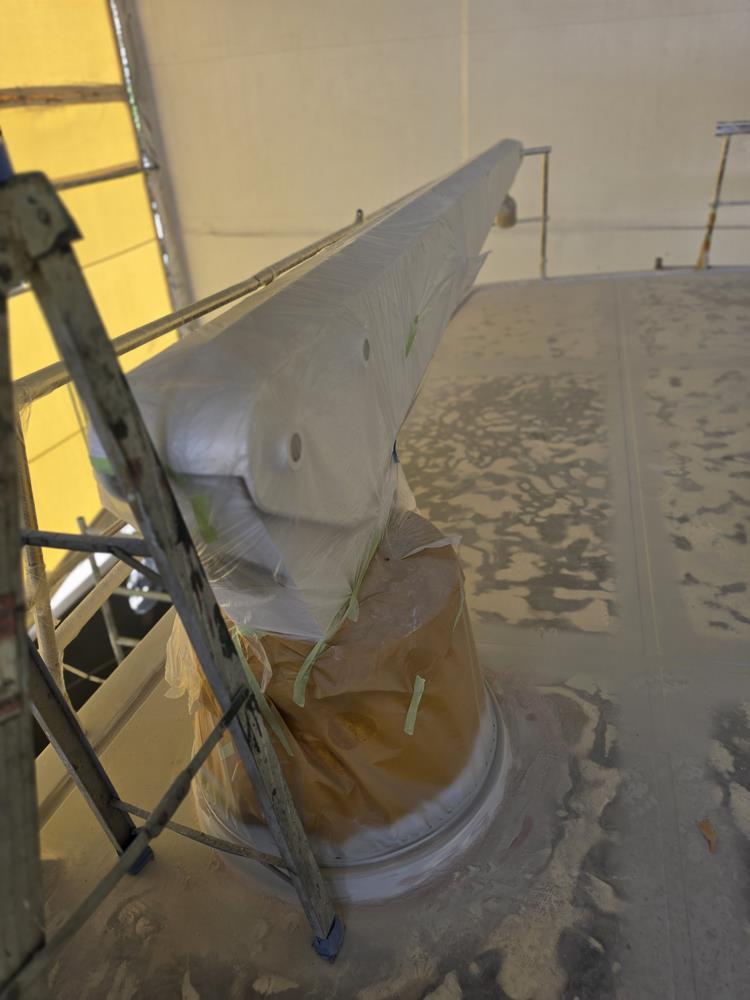
The crane does not have a compression post, it is just mounted to the boat deck with through bolts. I looked at the construction and it looks very sturdy, but susceptible to flexing. There was gelcoat around the base which had cracked. RAM ground out the old gelcoat and fiberglassed the area. Time will tell if it works better than the factory install.
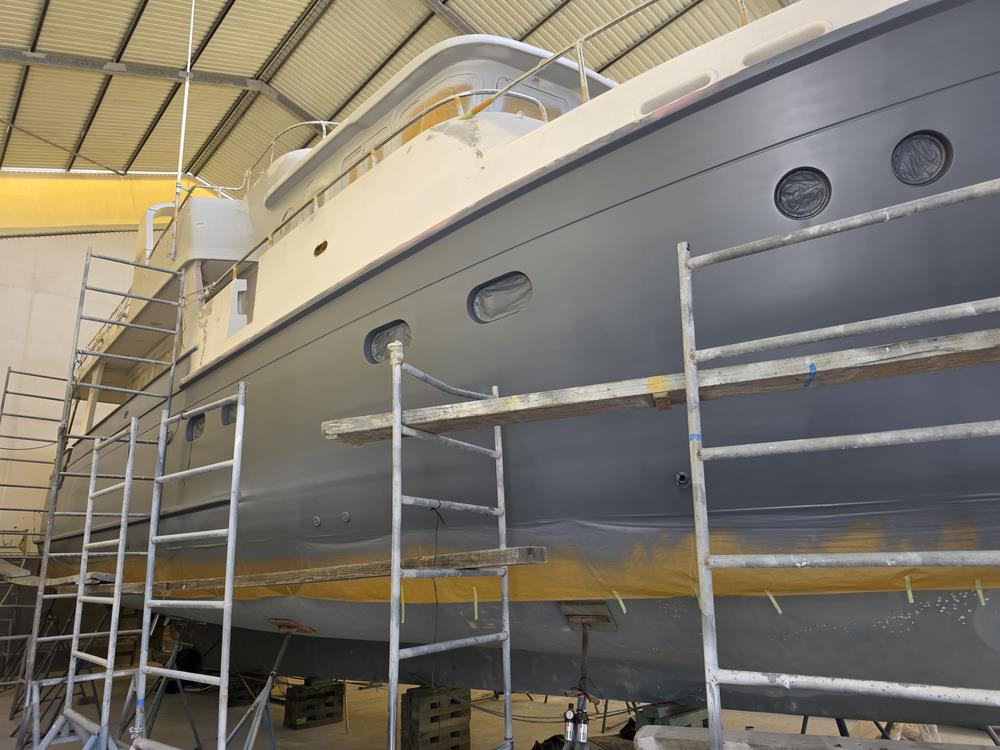
The starboard side is catching up to the port side.
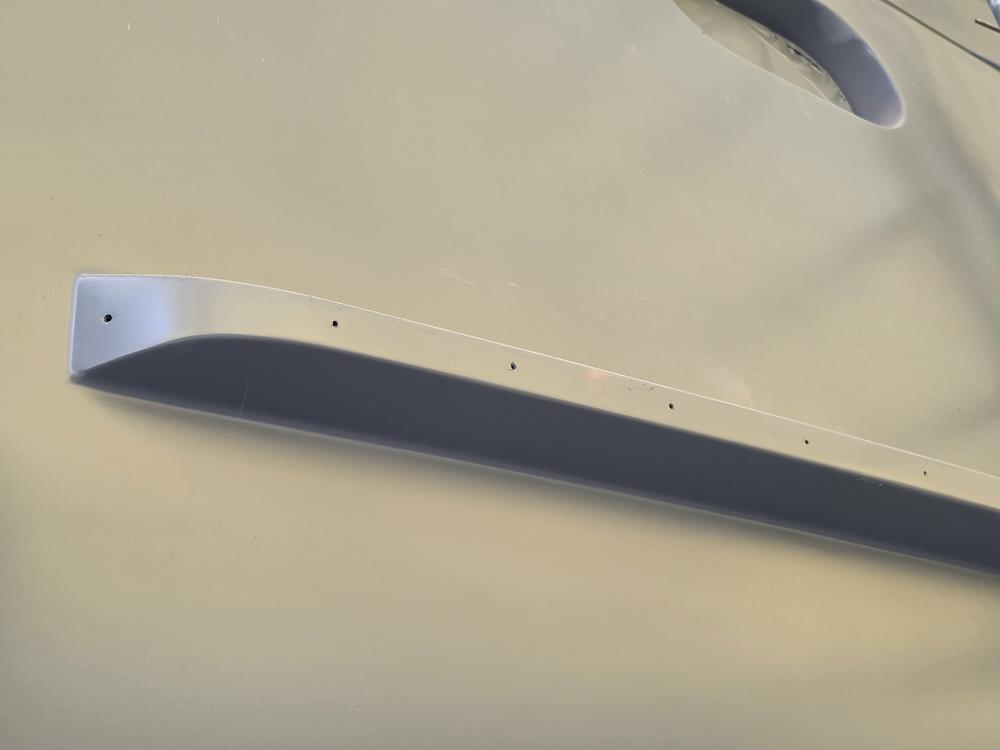
Rub strake detail. They remove the stainless steel rub rails to paint. They will polish it and reinstall it with new 316SS screws.
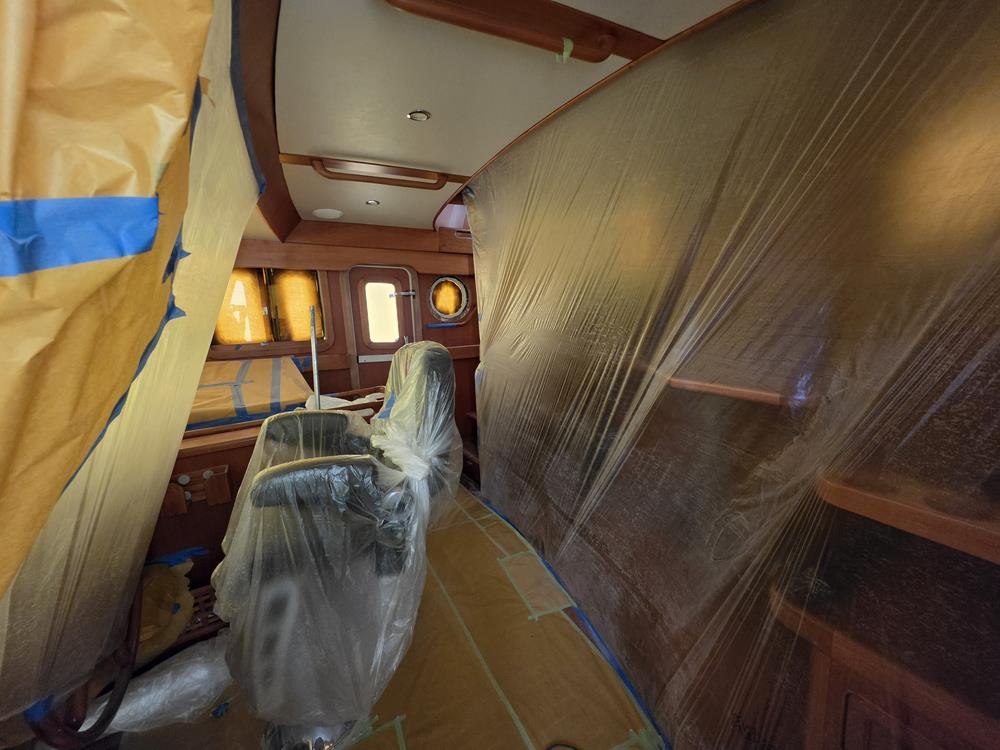
We had sun damage on some of the teak in the pilot house. Primarily the teak around the windows and flybridge companionway. Adil's crew put plastic up to control the dust and keep it confined. The trim around the windows is thin veneer. They removed the trim pieces so they could work on them back in their shop. The wood will be removed from the pilot house doors and will be painted to look like teak. That will make them more weather resistant but still retain the teak look.
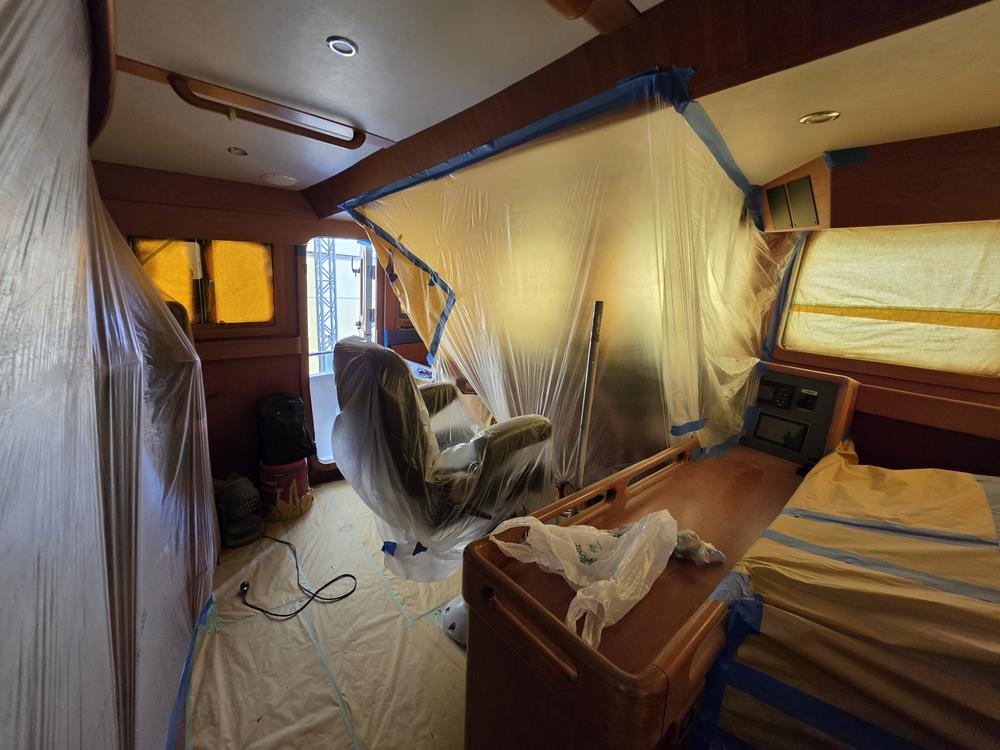
Another angle of the pilot house.
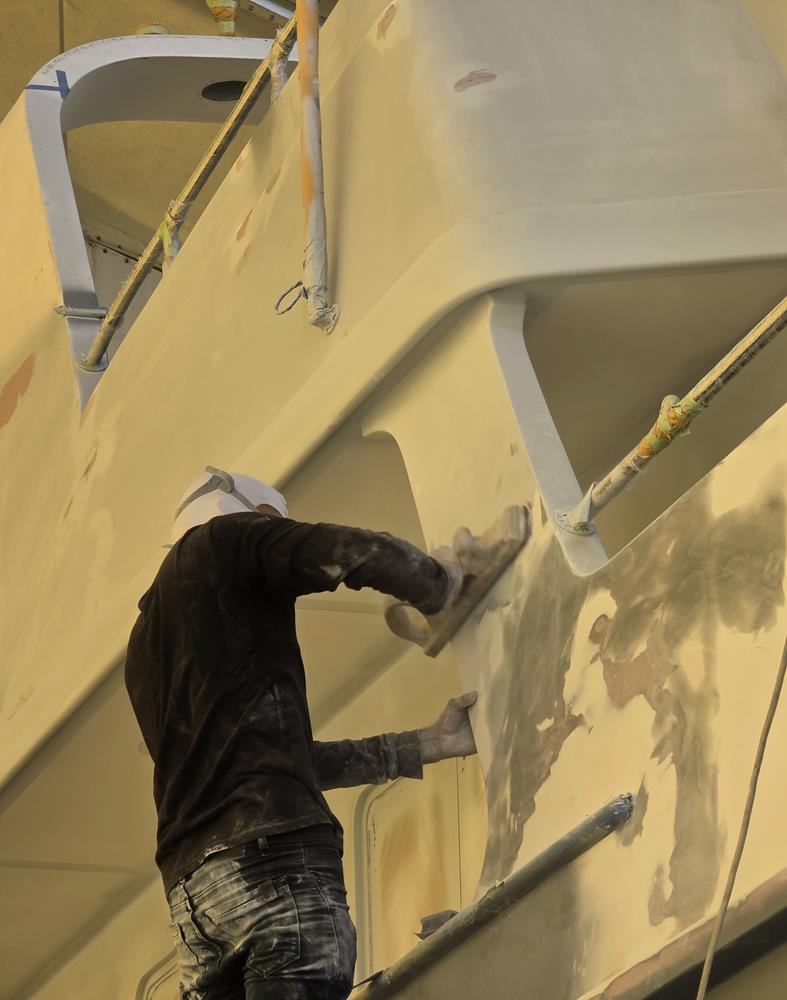
Back to sanding, priming and fairing the superstructure.
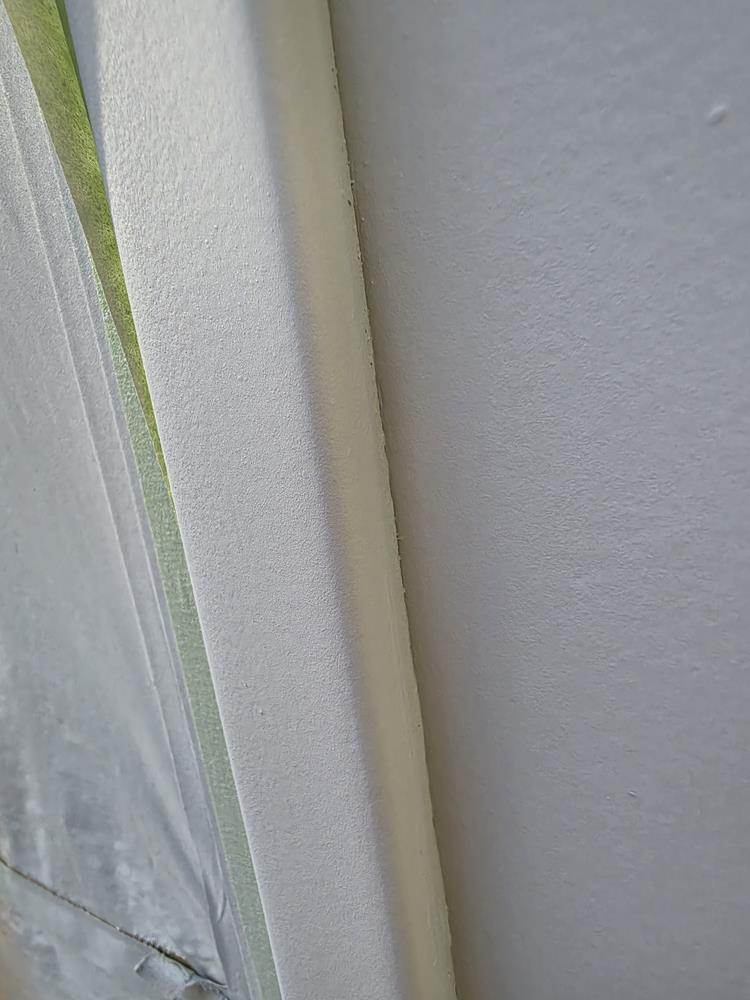
This is a close-up of the frame around one of the front pilot house windows (we have the painted frames, not the stainless steel ones). This detail shows how the crew removes as much of the caulking around the frame before painting. They apply the primer and paint, then will apply new caulking on top of the fresh paint. This also applies to the caulking around the teak cap rails.
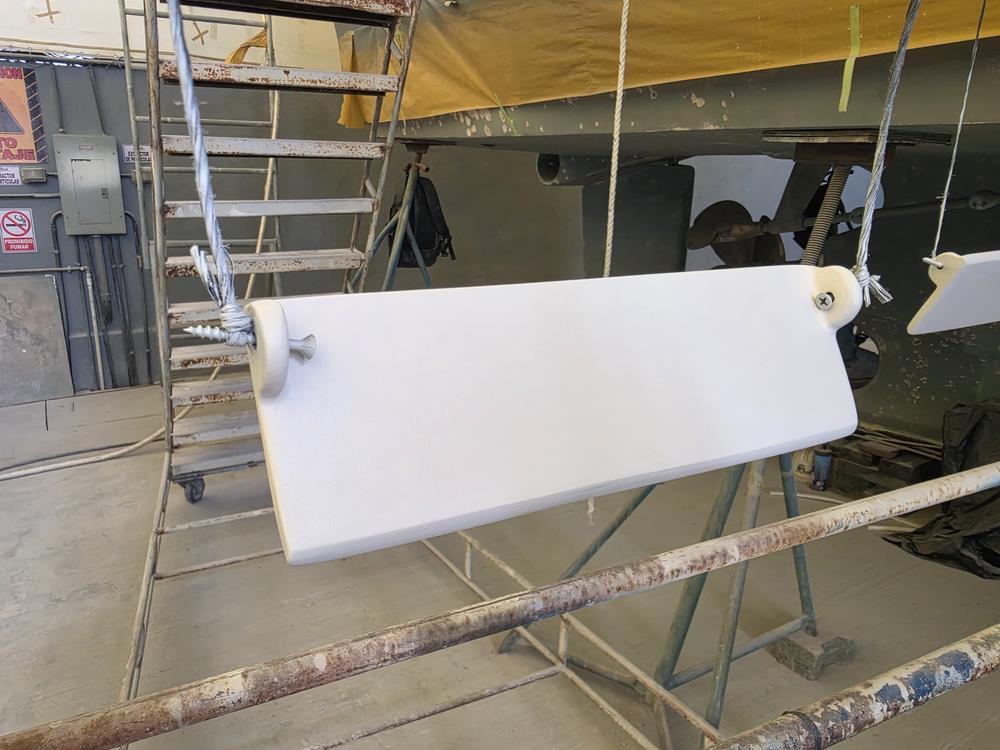
One of the scuppers that are being painted. I had one scupper on the transom that had the paint peeling off and the surface was bubbling up like it was made out of cardboard (it wasn't, but that's the best way I can describe it). Luckily the prior owner bought a replacement that just needed painting. Another annoying item I can check of the "to do" list.
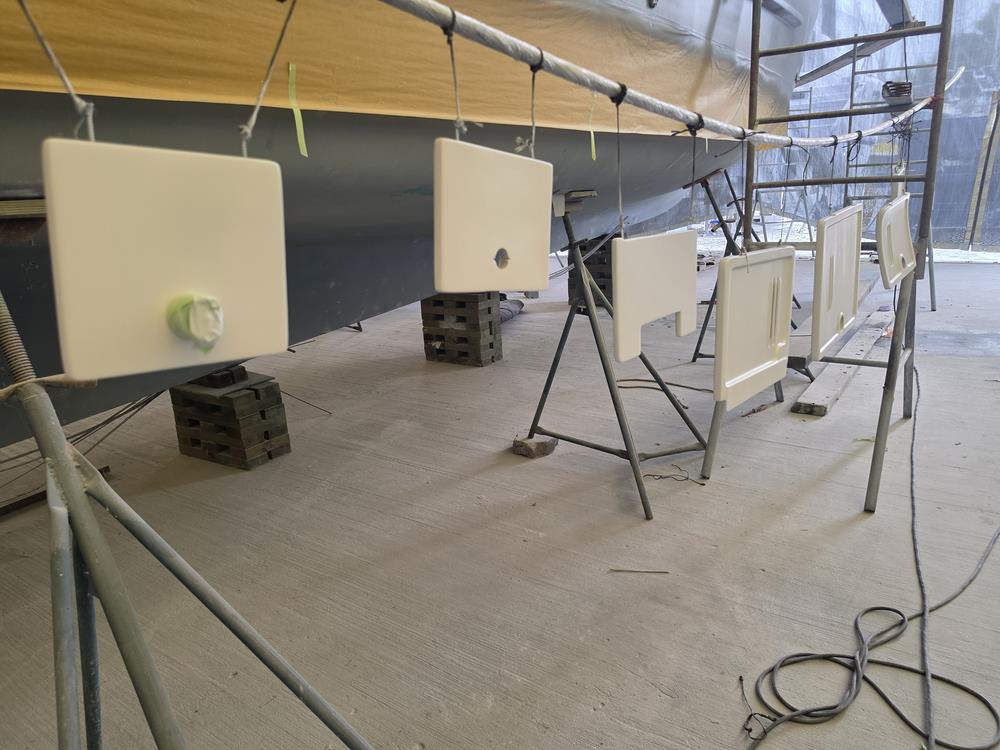
All of the exterior locker doors were removed to be painted. They will be remounted with new screws.
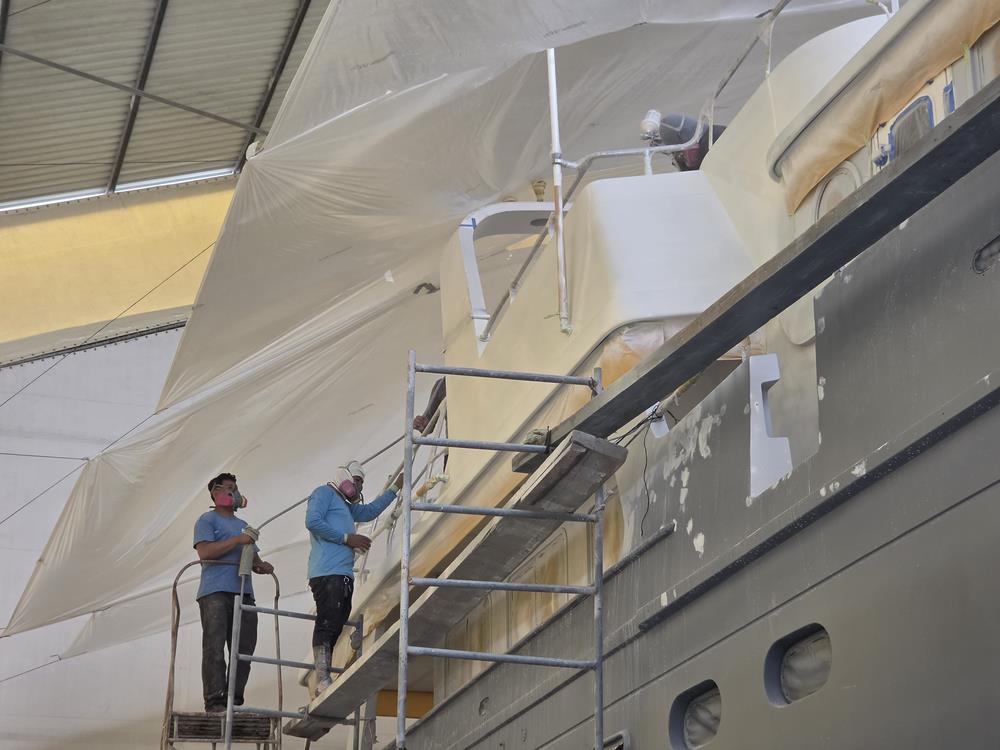
As it stands on October 15, 2026 the first of 3 final coats is being applied to the flybridge. The arch will need to be completed after the hardtop is attached. We decided on using Awlgrip on the superstructure and Awlgrip HDT on the hull.
When Untethered leaves Rio Dulce it will be a much better boat than the one we bought 5 1/2 years ago. Many long standing issues will be resolved, the color will be amazing, and it will look incredible - probably better than new. The paint will be easier and less costly to maintain than gelcoat, and the finish will be shiny and beautiful.
I will do one more blog post when the paint is complete, at least one blog post on how the hardtop is designed and built, and another blog post on RAM Marina, living in Rio Dulce and Guatemala in general.